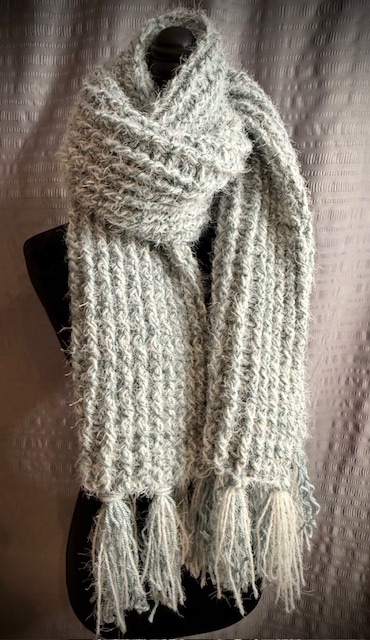

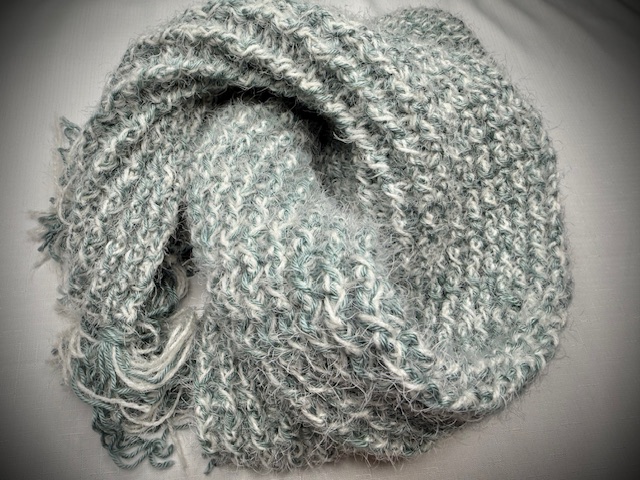
If you’re searching for a free crochet scarf pattern that is beginner-friendly yet beautifully textured, the Morning Mist Crochet Scarf is the perfect project for you! This crochet scarf design features a simple but striking ribbed texture, created by working front and back post double crochet stitches along the scarf’s entire length. You’ll also discover the magic of holding two yarns together to achieve a soft, heathered effect with a marbled twist. One of the yarns adds a delicate fuzzy halo and silky softness, making this scarf as luxurious as it is cozy. Whether you’re new to crochet or looking to expand your stitch repertoire, this pattern is perfect. Read on to learn more about the scarf and get the free crochet scarf pattern! Plus, there’s a free video tutorial available on YouTube to guide you through each step of the pattern. CLICK HERE! to start watching…
Why You’ll Love the Free Morning Mist Crochet Scarf Pattern
The Morning Mist Crochet Scarf combines both texture and color in a way that is simple to achieve but looks stunningly professional. Here are a few reasons why you’ll fall in love with this project:
- Beginner-Friendly Crochet Stitches: This pattern applies a modification to the traditional double crochet stitch and introduces the front- and back-post double crochet to create a ribbed effect. These stitches are easy to learn and add a beautiful texture to this scarf.
- Soft Heathered Finish: By holding two different yarns together, you’ll create a marbled, heathered effect that adds depth to the scarf’s color. This technique is a fantastic way to experiment with blending shades for a more unique, custom look.
- Luxe Feel: The addition of a Caron Latte Cakes yarn with a halo (a soft, fuzzy coating) adds a touch of elegance and makes the scarf feel extra soft and cozy against the skin.
- Perfect for Gifting: Handmade scarves are always appreciated gifts, and this design is sure to be a hit with friends and family.
About the Stitch Pattern: Front and Back-Post Double Crochet
Front- and back-post double crochet stitches are the stars of the Morning Mist Crochet Scarf. These stitches create raised ridges that run the entire length of the scarf, giving it a rich texture reminiscent of soft, rippling waves. If you’re new to post stitches, don’t worry! They’re surprisingly easy to learn and the YouTube tutorial video will show you exactly how to create them.
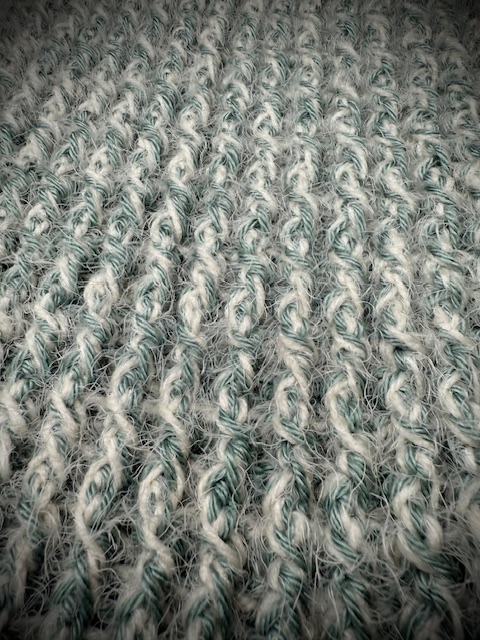
- Front Post Double Crochet (FPdc): Instead of working your double crochet into the top of the stitch, you insert your hook around the post of the stitch from front to back. This pushes the stitch forward to create a raised ridge.
- Back Post Double Crochet (BPdc): Similar to the FPdc, but this time you insert your hook from back to front around the post of the stitch. This pushes the stitch to the back, creating an alternating ridge pattern.
The Yarn Choice: Creating a Heathered, Marbled Effect
One of the unique features of the Morning Mist Scarf is its heathered, marbled color effect. This is achieved by holding two different yarns together as you crochet. Here’s what to consider when selecting your yarn:
- Color Blending: You can create a subtle blend by choosing two similar shades, or go bold with contrasting colors for a more dramatic effect.
- Texture and Halo: The Caron Latte Cakes yarns used in this pattern has a soft halo, which gives the scarf a delicate, dreamy appearance.
- Weight: To keep the scarf lightweight yet cozy, choose two yarns in similar weights. For a beginner-friendly option, worsted-weight yarn is a great choice.
Materials You’ll Need
- Yarn: Two yarns of your choice, held together. You’ll need approximately 800 yards of each yarn.
- Crochet Hook: A US size L11/8.00 mm hook is recommended for this pattern, but feel free to adjust based on your tension.
- Scissors and Tapestry Needle: For finishing off your ends neatly.
How to Crochet the Free Morning Mist Crochet Scarf Pattern
Here’s a quick overview of how to crochet the Morning Mist Scarf. The full, detailed pattern will follow:
- Foundation Row: Begin with a foundation chain that is the length of your desired scarf. This pattern is worked lengthwise to emphasize the ridged texture.
- Set Up the Ridges: Work the first row in double crochet across the entire foundation chain.
- Establish the Texture: Alternate between front and back post double crochet stitches for the remaining rows. This will create the ribbed, ridged texture.
- Finishing Touches: Fasten off and weave in your ends. You may choose to block your scarf to help the texture stand out and ensure it lies flat.
Customizing Your Scarf
The Morning Mist Scarf is highly customizable! Here are a few ways you can make this pattern your own:
- Adjust the Width: Add or subtract chains from your foundation row to make a wider or narrower scarf.
- Stitch Multiple = 2 + 2
- Change the Length: Want a shorter, more tailored scarf or an oversized wrap? Simply adjust the number of chains in your foundation row.
- Experiment with Yarn Combinations: Try different color blends or textures to create a completely unique look.
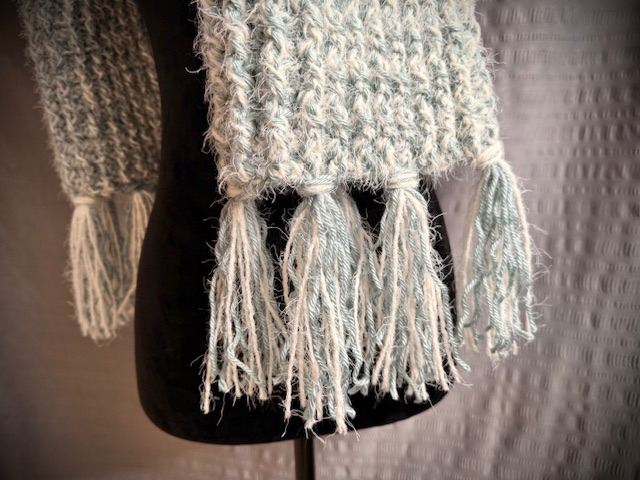
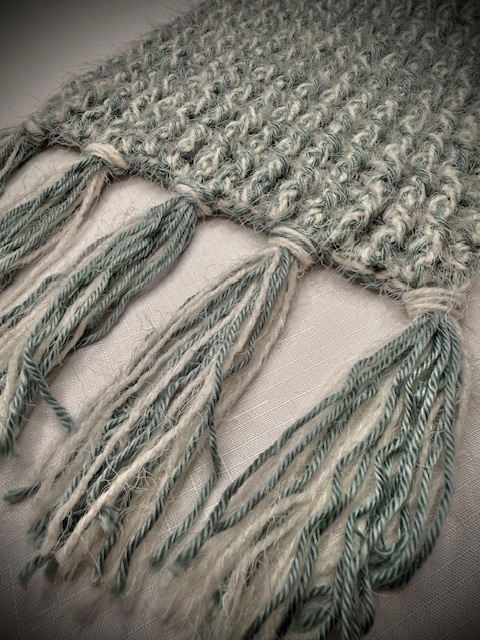
- Add Fringe/Tassels: For an extra touch of flair, consider adding fringe to the ends of your scarf.
Final Thoughts
The Morning Mist Crochet Scarf is a perfect project for anyone looking to create a beautiful, textured accessory with minimal effort. By mastering front- and back-post double crochet stitches, you’ll add a valuable new technique to your crochet toolkit. Plus, the heathered effect from holding two yarns together gives the scarf a luxurious, designer feel that’s sure to turn heads.
Whether you’re keeping it for yourself or gifting it to a loved one, the Morning Mist Scarf is sure to become a cherished favorite. Ready to get started? Grab your yarn and hook, and let’s crochet!
Don’t forget to check out the free video tutorial on YouTube to guide you through each step of the pattern AND this site for more Free Crochet Scarf Pattern.
Let’s Get Started!
Now that you know what to expect, it’s time to grab your materials and start crocheting!
- Skill Level: Beginner – need to know the chain, double crochet – I will teach you the front and back-post double crochet stitches.
- Scarf Size: 9.5 inches (23.75 cm) wide X 60 inches (153 cm) long
_______________________________
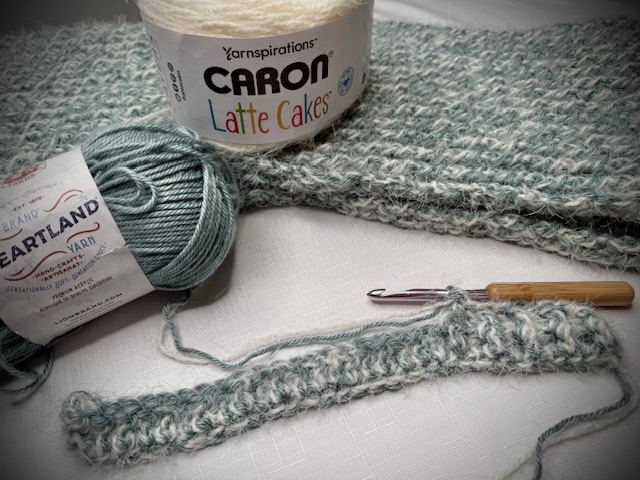
Supplies:
- (2) Cakes of Caron Latte Cakes in Cream: Click HERE
- (4) Skeins Lion Brand Heartland Yarn in Congaree: Click HERE
- Susan Bates US L11/8mm Crochet Hook: Click HERE
- Darning/yarn needle: Click HERE
- Tupperware Thatsa Medium Prep Bowl: Click HERE
***As an Amazon Affiliate I earn from qualifying purchases but this does not affect your purchase price
________________________________
US Standard Crochet Abbreviations:
- ch – chain
- st – stitch
- dc – double crochet stitch
- hdc – half-double crochet stitch
- FPdc – Front-Post double crochet stitch
- BPdc – Back-Post double crochet stitch
- [xx] – number of finished stitches in a row
Stitch Glossary:
- Front-Post Double Crochet Stitch:
- FPdc: Yarn over, insert hook from front-to-back-to-front around the post of the indicated dc stitch; yarn over and pull up a loop (3 loops on hook); yarn over and pull through 2 loops on hook; yarn over and pull through last 2 loops on hook. The stitch is complete when you have just 1 loop on the hook.
- Back-Post Double Crochet Stitch:
- FPdc: Yarn over, insert hook from back-to-front-to-back around the post of the indicated dc stitch; yarn over and pull up a loop (3 loops on hook); yarn over and pull through 2 loops on hook; yarn over and pull through last 2 loops on hook. The stitch is complete when you have just 1 loop on the hook.
Stitch Multiple: 2 + 2
______________________________
Free Crochet Scarf Pattern:

Holding both yarns together, Chain 34
- Row 1 – dc in 3rd ch from hook; dc in each to the end of the row. [32 stitches]
- ch 2; turn
- Row 2 – FPdc around the post of 2nd stitch in the row below; BPdc around the post of the next stitch; *FPdc around the post of the next stitch; BPdc around the post of the next stitch;* Repeat between * * 13 times; FPdc in next; hdc in the turning chain from previous row. [32 stitches]
- ch 2 and turn
- Row 3 – BPdc around the post of 2nd stitch in the row below; FPdc around the post of the next stitch; *BPdc around the post of the next stitch; FPdc around the post of the next stitch;* Repeat between * * 13 times; BPdc in next; hdc in the turning chain from previous row. [32 stitches]
- ch 3 and turn
- Row 4 – end: Repeat Rows 2 & 3
- End when you achieve the desired length
- Tie off and weave in the loose ends
Optional Tassels:
- Gather Your Materials
- Yarn
- Scissors
- Ruler/cardboard – sized to desired length of tassels
- Crochet Hook (optional)
- Prepare the Cardboard
- Cut a piece of sturdy cardboard to match the desired length of tassel.
- Wrap the yarn
- Hold the end of the yarn against the cardboard
- Begin winding the yarn around the cardboard lengthwise (vertically)
- Continue to wind a total of 12 times. Keep the tension even but not too tight
- Remove from cardboard
- Carefully slide the wound yarn off the cardboard while keeping loops intact.
- Attach using a slip knot to the end
- Insert loop end through the desired stitch on the end of the scarf
- Pull through about 1/2 the length of the tassel
- Pull the other end of the tassel through the loop in previous step
- Pull gently by firmly to secure the tassel on the scarf
- Trim the Tassel as needed
See how to add the tassels/fringe by watching this Free YouTube Video: CLICK HERE!
Crochet YouTube Video Tutorials:
Kelly Rene Everyday YouTube Channel
Check out the Video Tutorial of the Vanilla Ripple Blanket: CLICK HERE!
Other popular YouTube Tutorials:
The Frosty Matcha Crochet Scarf YouTube Tutorial: CLICK HERE!
Crochet Basket Weave Dishcloth: CLICK HERE
Christmas Crochet Coaster: CLICK HERE!
The Granny Rectangle Baby Blue Blanket: CLICK HERE!