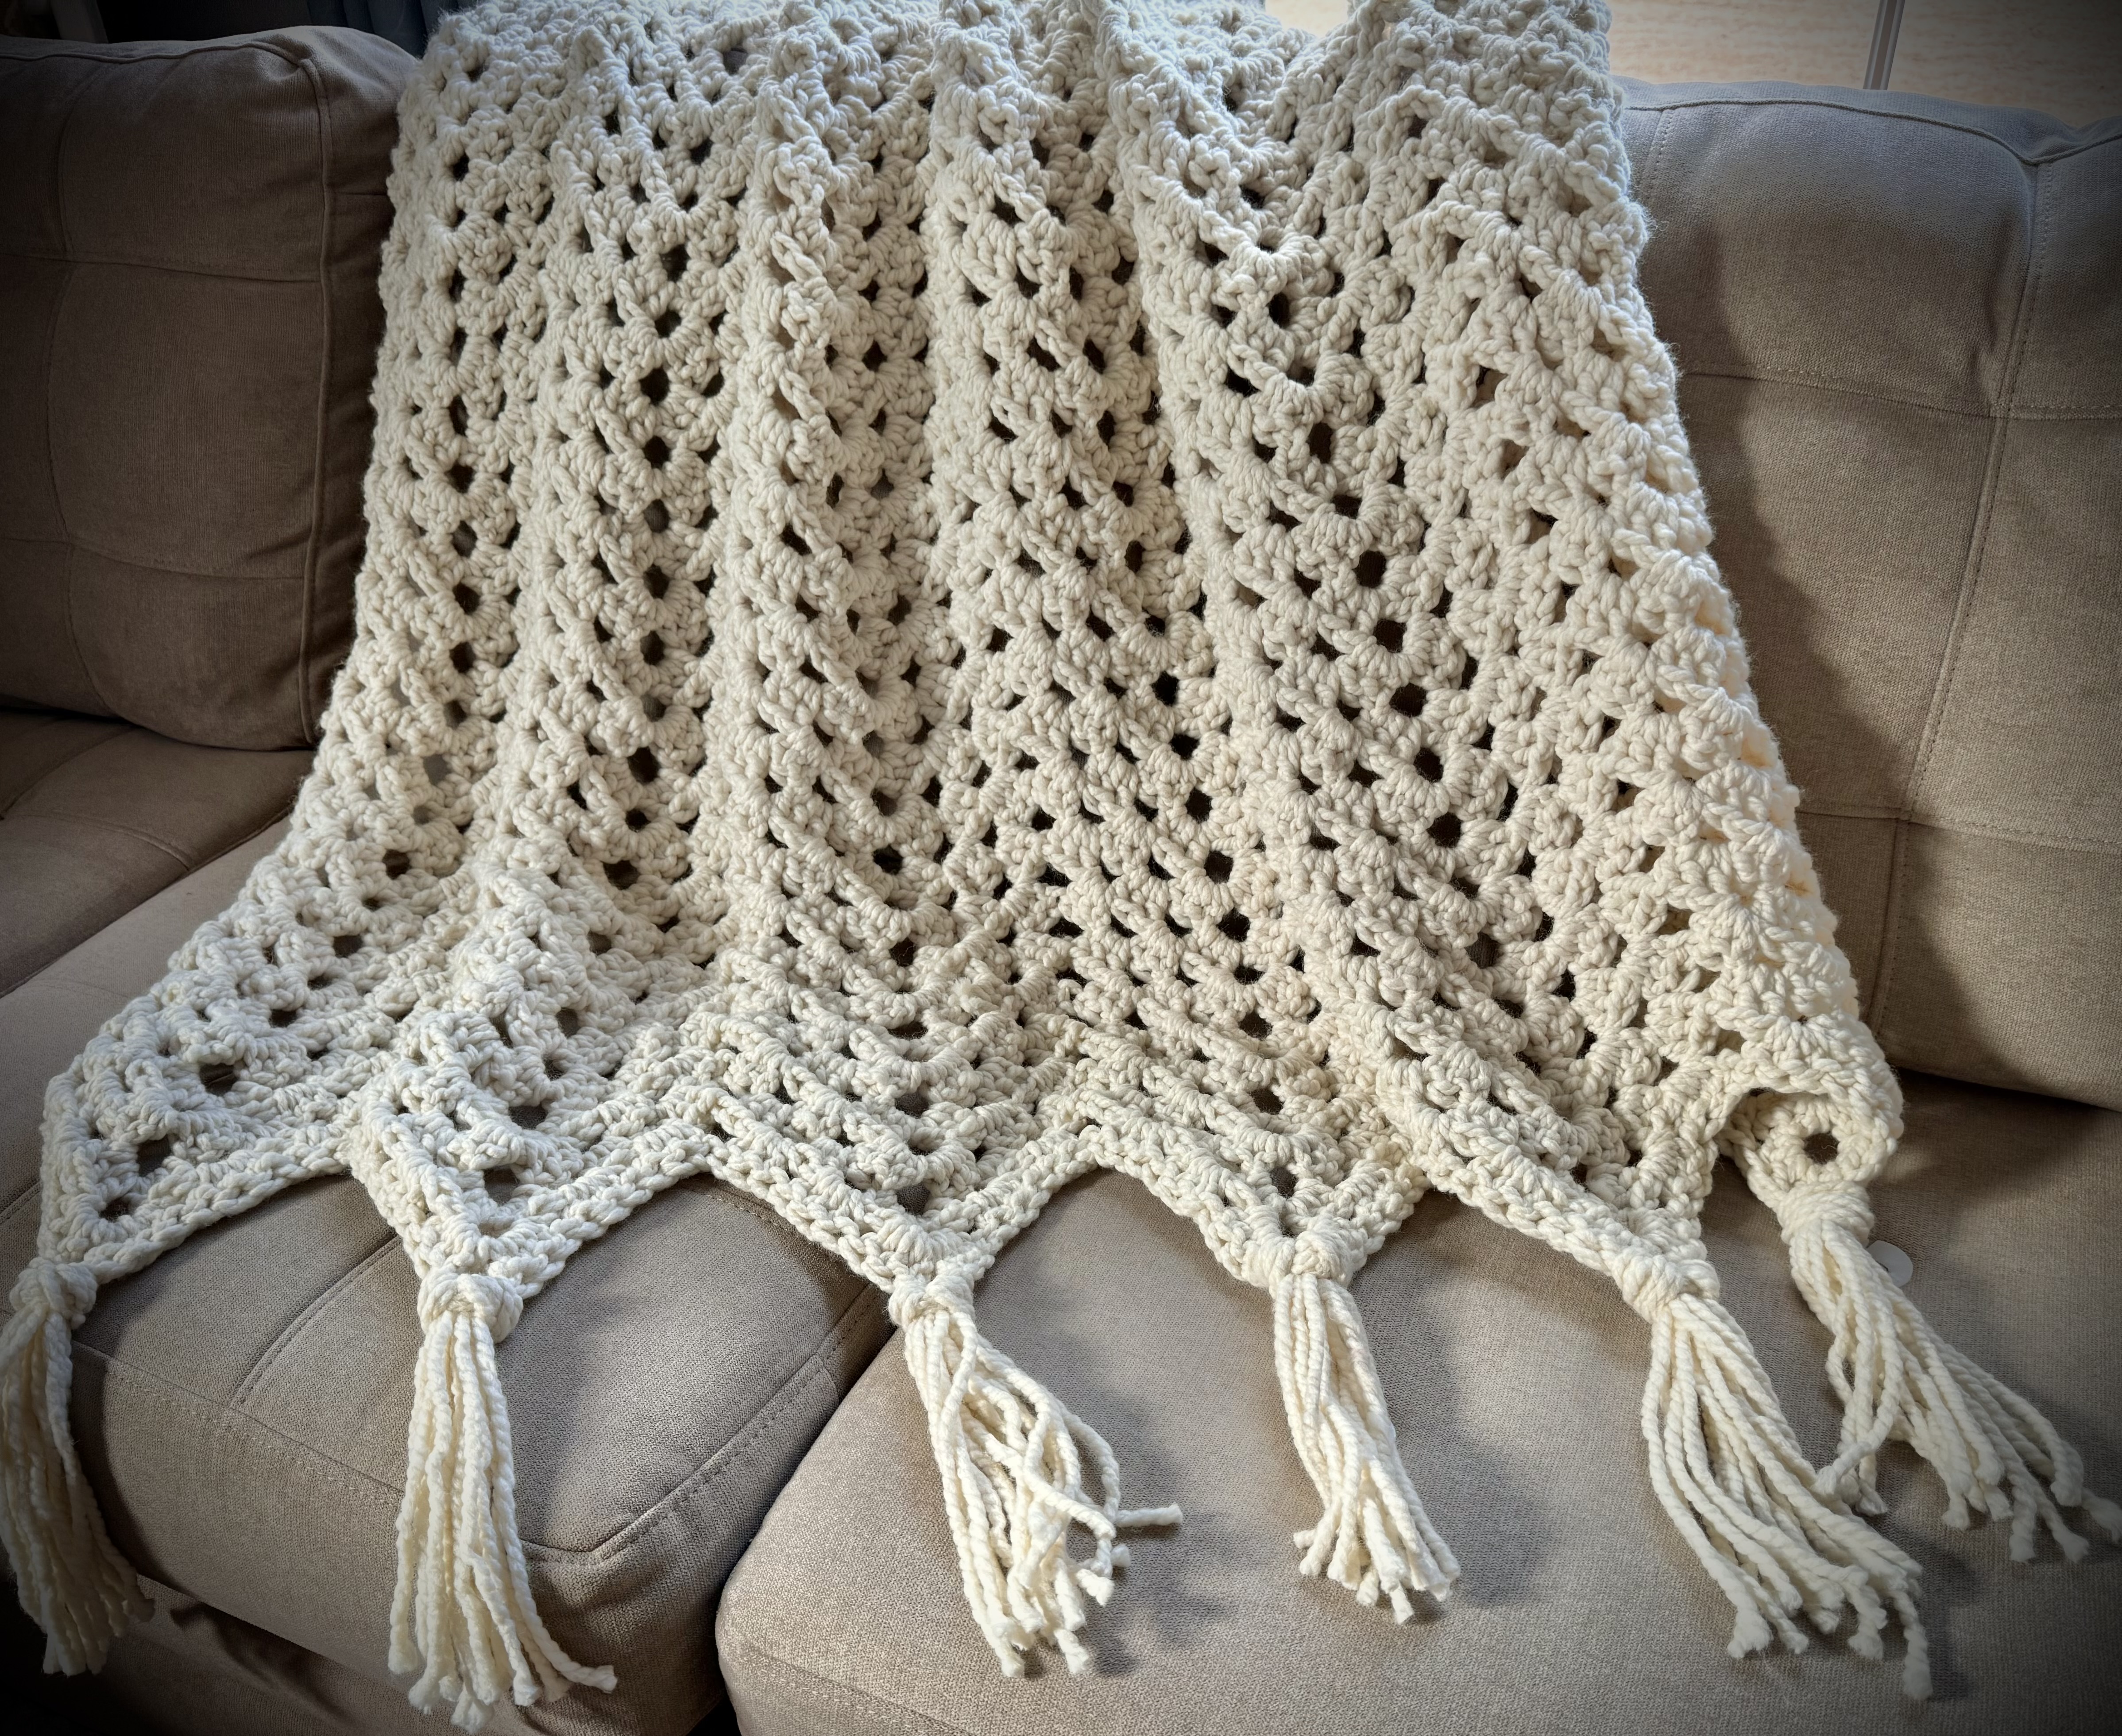
This is a great blanket if you want something simple to work on, but still looks really nice when it’s finished.
You will be using the granny ripple stitch, which is just a repeat once you get it set up. If you’ve ever had trouble keeping your edges straight or figuring out where stitches go, this pattern will help with that.
The chunky yarn also helps this one work up pretty quickly, so you can actually see progress as you go.
This has become one of those patterns that is easy to come back to once you understand the repeat.
_______________________________
Step-by-Step Video Tutorial on YouTube
Link to the YouTube demonstration video is below.
If this stitch is new to you, I would recommend watching the beginning of the video first — especially how the peaks and valleys are set up. That part will make the rest of the pattern make a lot more sense.
👉 CLICK HERE for the full video tutorial
_______________________________
Skill Level: Beginner
- double crochet
- chain
- slip stitch
_______________________________
Blanket Size:
Approximately 48″ wide x 67″ long (not including tassels)
_______________________________
Supplies:
[As an Amazon Affiliate I earn from qualifying purchases but this does not affect your purchase price]
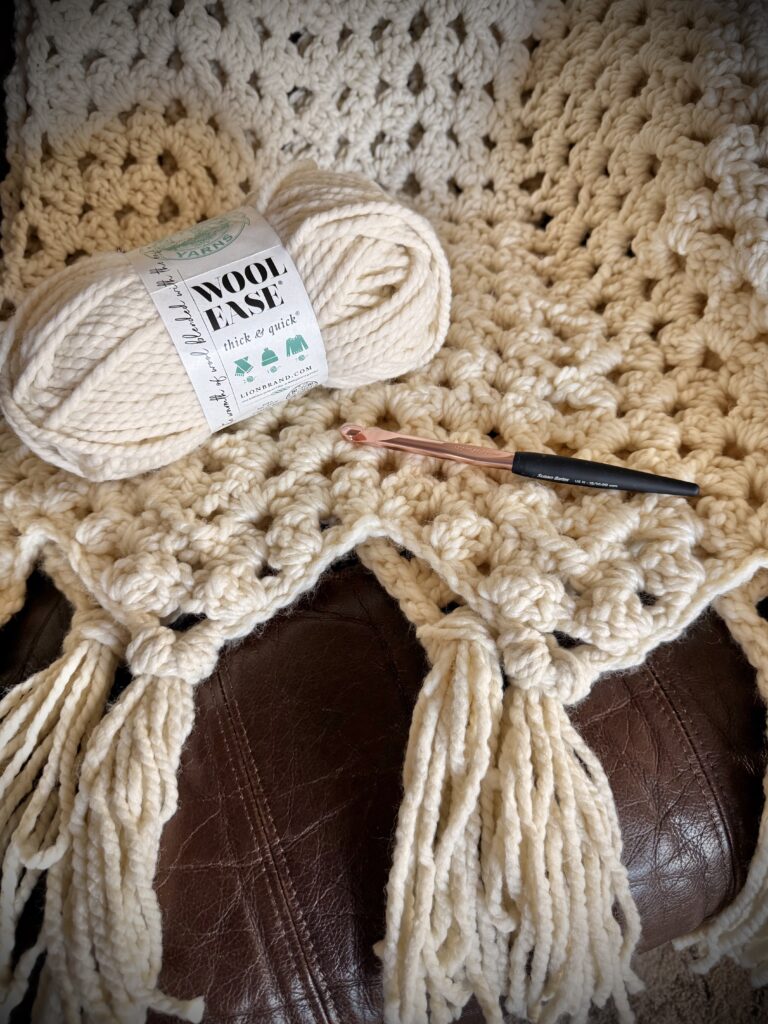
- (12) Skeins Wool Ease Thick & Quick in Fisherman (106 yds) Super Bulky Yarn:
- Link👉 Click HERE
- Susan Bates USN15/10mm Crochet Hook:
- Link👉 Click HERE
- Darning/yarn needle:
- Link👉 Click HERE
- Tupperware Thatsa Medium Prep Bowl:
- Link👉 Click HERE
I used 11 skeins for the blanket and 1 skein for the tassels
________________________________
US Standard Crochet Abbreviations:
- ch – chain
- st – stitch
- dc – double crochet stitch
- G-Cl – Granny Cluster Stitch (3 dc into the same stitch or space
- G-Sp – Granny Space (Space between 2 G-Cls)
- sl-st – slip stitch
- [xx] – number of finished stitches in a row
_______________________________
Pattern Notes:
- Stitch Multiple: 18 + 1
- Turning chain does not count as a stitch
______________________________
The Vanilla Ripple Pattern Instructions:
Chain 109
________________________
Row 1:
- sl-st into the 2nd ch from hook and each ch there after. [108 stitches]
- Do not chain, turn
This sets your base. Make sure your stitch count is correct here — it will carry through the whole blanket.
________________________
Row 2:
- 3 dc into the 5th stitch, skip 2 stitches, G-Cl into next stitch, skip 2 stitches
- (G-Cl, ch 3, G-Cl) in next stitch (this is your peak)
skip 2 stitches, G-Cl into next stitch, skip 2 stitches, G-Cl into next stitch - skip 5 stitches (this creates the valley), G-Cl into next stitch, skip 2 stitches, G-Cl into next stitch, skip 2 stitches, (G-Cl, ch 3, G-Cl) in next stitch
- Repeat between * * across
- dc into last stitch
- ch 4, turn
Watch that skip of 5 — that’s what creates the dip in the ripple. This is an easy place to miscount.
________________________
Row 3:
- G-Cl in first G-Sp, G-Cl in next G-Sp
- (G-Cl, ch 3, G-Cl) in ch-3 space (peak)
G-Cl in next two G-Sp - skip next G-Sp (valley), G-Cl in next two G-Sp, (G-Cl, ch 3, G-Cl) in ch-3 space, G-Cl in next two G-Sp
- Repeat across
- dc in last space
- ch 4, turn
________________________
Row 4 – End:
Repeat Row 3 until you have used approximately 11 skeins or reached your desired length
________________________
Finishing:
- Tie off and weave in all loose ends
- Add tassels if you would like
________________________
Helpful Tips (Before You Get Too Far):
- Count your stitches every few rows — especially at the beginning
- The first two rows are the most important, take your time here
- Once the pattern clicks, it becomes very repetitive
- If you lose your place, look for your peaks (the ch-3 spaces) to reset
________________________
How to Adjust the Size:
If you want to change the size of the blanket:
- WIDTH:
Chain in multiples of 18 + 1 - LENGTH:
Repeat Row 3 until you reach the length you want
________________________
Yarn Notes:
If you use a different yarn:
- Lighter yarn will take longer but give more drape
- You may need to adjust your hook size
- The ripple will still work — it will just look smaller
________________________
Troubleshooting:
If your blanket is getting wider or narrower:
You are likely adding or missing stitches in the valley (the skip 5). Go back and double check that section.
If your ripple doesn’t look right yet:
Make sure your peaks (G-Cl, ch 3, G-Cl) are going into the ch-3 space from the row below.
If your edges aren’t straight:
Check your first and last stitch of each row and make sure your stitch count stays the same.
If your stitches feel tight:
Try going up a hook size or loosening your tension slightly.
If your stitches feel tight:
Try going up a hook size or loosening your tension slightly.
________________________
Frequently Asked Questions
Is this a good beginner crochet blanket pattern?
Yes — once you understand the repeat, it’s very manageable and a good way to practice stitch placement.
Do I have to use chunky yarn?
No, but chunky yarn makes it easier to see your stitches and helps the blanket work up faster.
How long does this take to make?
With super bulky yarn, it works up fairly quickly compared to most blankets.
Do I need to add tassels?
No — those are optional.
________________________
Wrap Up:
This is one of those patterns that might feel a little confusing at the start, but once it clicks, it becomes very easy to work.
It’s a good one to come back to if you want something repetitive but still interesting, and it’s a great way to get more comfortable with stitch spacing and pattern repeats.
________________________
More Beginner Crochet Patterns
- The Up-Down Crochet Blanket Pattern:👉 CLICK HERE!
- The Granny Rectangle Baby Blanket:👉 CLICK HERE!
- The Hi-Low Dishcloth:👉 CLICK HERE!
________________________
More Beginner Crochet Video Tutorials:
My YouTube Channel:👉 Kelly Rene Everyday
- The Frosty Matcha Crochet Scarf YouTube Tutorial:👉 CLICK HERE!
- Crochet Basket Weave Dishcloth:👉 CLICK HERE
- Christmas Crochet Coaster:👉 CLICK HERE!
- The Granny Rectangle Baby Blue Blanket:👉 CLICK HERE!